How to Cut Fleece for Crochet Backings
This project was presented on board the Crochet Cruises for October 2017 and again June 2018. The goal is to cut the Fleece, generously provided by JOANN Fabrics & Crafts. We will be applying a crochet border to the fleece and attaching to our project.
To match your project, here is what you need to do.
- Measure your project in both width and length.
- Take your measurement and subtract 1" from both length and width.
- Place your fabric down on the cutting mat. Bottom edge of fabric to match the line in the board. Fold over the fabric in the horizontal direction so it is half the distance of what you need. So if you needed 48" the fold is at the 24" mark. Place the fold so it matches the vertical line in the board and the bottom edge is following the horizontal line.
- Using a straight edge, cut the fabric top and bottom pieces in a smooth cut with the rotary blade.
- Fold the newly cut piece in half in the vertical direction. If right handed, turn click wise 90 degrees. Match the fold and bottom edge to the board. Measure the across the distance, in our case, 24". Using rotary cutter, cut all 4 layers at the same time in the vertical direction. Leave project folded as is.
Skip Cutting
- Measure 1" in from a non-folded edge. Skip cut in the vertical direction.
- Turn the fabric so the other non-folded edge is in the vertical direction. Measure in 1" and skip cut in the vertical direction.
Chamfer
- You will see the two skip cut lines, if you don't. It's 1" in from the top and 1" from the side on the only non-folded corner. Slice off all four layers at one time pass at a 45 degree angle.
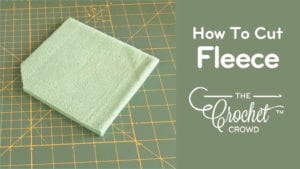
Your fleece is ready to have a border applied.
Tutorial - Cutting Fleece
Tutorial - Adding Border to Fleece
coming soon
More Fleece Articles
[the_grid name="Fleece"]
Leave me your thoughts...